Showing posts with label Procion MX. Show all posts

Thursday, 28 February 2013

Dying Balls of Crochet Thread!


FUN TIMES ALERT!

I have been really excited about an idea I had for dying my cotton crochet thread while it was wound in a ball.Crochet thread is my number one resource, because it is inexpensive and I use it in so many ways including: weaving on my floor loom, inkle looms, incorporating it into tapestries, knitting lace and various crochet projects.  Suffice to say I have heaps of it stashed, and a great deal of that is cream, white, or ecru. 

I found this tutorial for the process I basically want to try, except instead of with wool, which you need to do on the stove, I will be using cotton, and just dying it in ice cream pails with fairly hot water.

My happy little balls of crochet thread.  They measured roughly 2.5-3.5 inches in diameter:


I mix my dye powder (Procion MX ) into boiling water until it is completely dissolved.  I do this outdoors with a dust mask and gloves.  Once the dye powder is dissolved the particles won't go airborne and I can safely bring the dye back into my kitchen.  I never use the same supplies for dying as I use for cooking/eating.  

I made turquoise, fuchsia, bright yellow, and navy:


I mixed together very hot water, washing soda, salt and a little bit of calgon in ice cream pails until they were completely dissolved. Then I poured in the dye.  Some buckets I just used the dye solutions from one yogurt container, and for a few I mixed them.  For example, to get the indigo skein I added a bit of fuchsia to my navy bath.  For the forest green one I added some bright yellow to navy.

Below are plain turquoise and plain navy baths:


Below is the indigo yarn prior to rinsing.  It looks fairly purple, but some of the fuchsia rinsed away leaving me with my indigo. I think there were two reasons my fuchsia didn't strike the cotton fully.  I didn't leave the ball in the dye bath for a full 40 minutes, and there is also a probability that my dyes are expiring.  I don't use them fast enough. 


I had to wrap my umbrella swift up in plastic because I was unwinding each ball into a skein so that I could properly rinse out all the dye.  This is where a PVC Niddy Noddy would come in seriously handy.  Gonna have to get on that. 


All the skeins!  I love the way they look.

As you can see below, I pretty much CAN'T do a dye day without grabbing as many random pre-made skeins I can find and tossing them into the pails alongside the actual experiment.  This gives me a fun array of miscellaneous colours to play with any way I like.  It turns out several of them will work nicely in my next tapestry project (I am on pins and needles right now as I prepare to thread that bad boy up for round 2). 


Balls of pretty thread waiting to become triangular shawlettes:


I chose to stop here with the balls being very close to white at one end, but on my next run I plan to re-wind each ball with the lighter end on the outside and set them in a second dye bath, so that I have a colour on each end that hopefully meld together near the middle.  This way I can orchestrate it so that I have, say, 6 finished skeins that blend from: purple to blue (1), blue to green(2), green to yellow(3) and so on through to red. YAY RAINBOWS!

For my first experiment I chose to knit a scarf using this fabulous One Row Scarf pattern, and the indigo blue and forest green skeins (my trial runs).  My idea was to start with the indigo at one end, knit until it ran out, then begin with the lighter end of the green skein and knit to forest green at the other: 


NEAT!  I have since finished off this blue , and just picked up with the lighter end of the forest green ball.  It is incredibly difficult to pick up on the join, because the lighter ends of both balls are almost identical.  However when I hold the light end up to the original ball of cotton I took it from, the color difference is quite apparent.  So even though the balls were wound tightly the dye did seep in and change even the innermost cotton.

I am pretty excited to see how this weaves up including: on the floor loom, possibly in combination with a painted warp; on the inkle loom so that the warp changes colours in vertical stripes; and in tapestry, where I think it could be very useful alone, or in combination with several solid threads to add a bit of interest.  Also, I recently figured out knitting entrelac, which I think this process would work for!

All in all this was a tremendous success, and I learned several things!  In the future I will use only tightly wound balls and try to keep them in the dye bath for the full recommended time.  I like the crisper speckled effect for this technique, so for the most part I will refrain from wetting out the thread prior to dying.  I can get smoother gradients from the mini-skein/mason jar technique (below).  

I'm also super excited to try:

-Winding five or six short skeins, where the yarn isn't cut in between them as seen here.
-Wool yarn on the stove as seen here, here, and here
-Same process as above with a wool cake, but dying it in quarters.  COOL effect!
-Long Colorways using mason jars and Kool-Aid! Here.

Thanks so much for visiting my blog!  I am always excited to get feedback, so if you have any comments or questions about my process just leave me a scribble!

JQ

Sunday, 4 March 2012

Colourful Fluffy!

Hello!

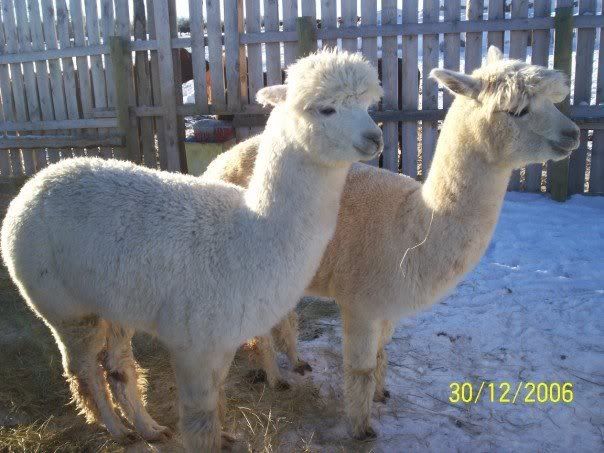
I'm trying this cool kettle dye technique where you submerse a bunch of fleece (I'm using one of my bags of finer white alpaca fleece from Fluffy) in just enough water and citric acid or vinegar solution to really saturate it in a big pot on the stove. Soak it for ten minutes then bring it up to a simmer. Once it is hot, sprinkle light amounts of dye onto the surface of the fibre and simmer with the lid on for 20 minutes. Poke open the fibre to reveal white areas, and sprinkle another colour. Simmer again to set. Do this again and again until you are satisfied with the effect. It is okay if there is still a bit of white left. The water should be mostly clear. Cool the pot, drain and rinse the fleece gently in room temp water. Avoid agitating it or it might felt.


Supposedly when the water is hot and acidic and the dye gets sprinkled on, most of it "strikes" the fibre as it touches. After 20 minutes most of that colour will be set.


For the turquoise and yellow I used double the amount of blue and sprinkled it one side of the pot (so a half moon). I let it steam for 1o minutes, then prodded the fiber with a spoon and let the last of the turquoise dye settle on the white side. This made a very pale blue, whole the original area was super intense. I then sprinkles some golden yellow onto the paler section, but didn't agitate it halfway through, I just let it simmer for the full 20.


This is the second dye pot. I sprinkled, set without agitating, flipped and opened the fibre gently, then sprinkled etc until I had dyed most of the white areas. There was still white/pastel areas when I dumped the pot but it's really quite lovely.

If you are curious about this or want to try it at home this is the link to the Youtube video that inspired me!

Happy weekend!

JQ

Note: Because I was using Procion MX, I DID NOT open the canisters and sprinkle freely in my kitchen. I took the pot outdoors and wore a dust mask and gloves. I don't like to have those little particles floating around my house/kitchen. They take to the air immediately when you open the containers and from what I recall from college they are carcinogens. They are fine once dissolved though, so I do simmer my dye pot in my kitchen.

Wednesday, 30 March 2011

Leviathan Day 6 (18 hrs)

Greetings Jellybeans!

(all these pictures should be clickable for a closer look)


So far I've managed to devote 3-4 hours a day to the loom which is pretty awesome. I *almost* finished the leaf at the lower left corner last night, but I made myself stop at the 4 hour mark. I'm finding it takes me more discipline to stop weaving than it does to start. If I do much more than 4 hours in a day my back really suffers.


I also did a bunch of dye work yesterday and for the most part I'm satisfied with the colours I got. Here are a few pictures of the prep/dye process. I measure my dye powder outdoors (or if it's really windy, in the shop) and I use a mask. Procion MX fiber reactive dye is not good for you. And the particles are very tiny and become air born as soon as you open the lid even in a still room. They float around and land on every surface. AVOID touching/inhaling these particles. Once you have them stirred into a bit of water you can breath easier.


We always used baby bathtubs for cellulose dyeing in college, so I picked up a few at garage sales, along with a set of large metal spoons and smaller metal measuring spoons, which I only use for my Procion dyes. None of this stuff is food safe once you've used it for this.


There's recipes for dying based on weight of dry fibre, and they tell you how much salt, soda ash and dye to use for all different colours. I am not of the school of thought that I need to be absolutely precise and keep a log so that I can repeat the same exact colour later if I run out. I look at it as a challenge to blend it out and blend in the new colour. I never have very much luck even with exact measurements getting the same shade so I don't bother. I enjoy being haphazard, and I take it when and where I can get it since tapestry is typically a very finite and controlled process.


The light yellow is a bit phosphorescent but I plan to blend it with duller more buttery yellows so that should take the edge off. Anyway, it will be nice to have some more concentrated areas that pop. For me there is rarely a colour fail in dying. I can always blend it with other colours I have in my stash, and the mottling that happens when I run two different colours together is very eye catching. My grey didn't turn out. It wound up very slate blue. I plan to do an over dye bath later today with some of my yellow and cool black again and see what happens. Initially I was going to space dye some of the yellow skeins with baby blues and lilacs and greens, but I decided that in the long run it is more useful for me to have mainly solids in each colour and then blend later. This way the cotton functions for tapestry as well as for my inkle weaving where I use it exclusively. I did use some pre-existing variegated cotton that was baby pink/blue/white and over dye it in the yellow with interesting results.

Here are the 2 batches of green I just finished dying this afternoon. I know I said I'd just do an over dye for the grey but I couldn't help myself. :P Oh and my grey turned out okay too. No pics yet.


It's almost time for me to start in on the lower right corner. I need to remember to weave in my signature. I have forgotten to do that in the past and this is such a huge project I really don't want to have only the fabric tag at the back.


Alright! I need to get a handle on the rest of my day here! Company is coming and I still need to devote at least 3 hours to the loom, do the grey over dye, and tidy up.

Hope everyone is having a good week!

JQ