
It's time for the second part of my three part Inkle tutorial! If you missed the first one on building your loom , click HERE. I know for a fact this is not the only way to create heddles in inkle weaving. I'm just showing you the cardboard loom version of the way I do it with my smaller looms. I learned it this way from friend of mine one afternoon in college.
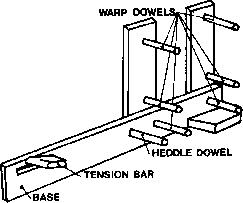
Since that tutorial I had a few questions about the two-sidedness of these looms and how they get warped. Most of the inkle looms on the market now only have one "wall" with dowels poking out. They look like this. The loom I used in college looked like this. I still have 2 double sided looms and enjoy working with them. Warping it is a little more of a pain, but it's very stable, and I remember actually weaving 5 inches wide on the one I learned with, but that's another post I think.

You will need some very strong, sturdy string for this. I recommend some kind of mattress thread or upholstery button thread, but you can also make do for now with a thick, strong sewing thread that you can't break with your fingers. Smoothness is essential to minimize fraying/breaking warp threads.I like to keep my heddles all the same length in a ziplock baggie marked for the loom I use them with. That way I can just take out as many as I need or make more if my pattern needs. I take a measuring thread and mark both ends with a sharpie, keep it in the bag, and use it to cut all my heddles. This way they are always the right length.
First thing's first, run a colourful (I used red) thread from your top rear bar to your bottom front one and secure it. This will show you roughly where your band will sit as you weave.

Next you will measure how long each heddle thread needs to be. Without cutting, draw a good length of string off the spool. Next take your heddle thread and loop it around the center bar,pulling both ends of the thread under and then back up around the bar and around beneath the heddle. leave some room extra for the overhand knots. Cut this length. Mark the ends with a sharpie.

Don't worry about being too finicky. As long as the string accommodates that length of red yarn, and doesn't overshoot it you should be okay. The finicky part will be the next step.
You can cut one trial string using your measure. Place an overhand knot about 1/4 inch from the tails, securing the two ends together and forming a loop. Don't cut the other threads until you are sure this one will sit where you want it.

Take the knotted end and place it behind the center bar, so that the knot is visible.

Tuck the loop end through the knotted end to secure the heddle. Measure it against your read yarn to see if it is where you like it. Don't worry if it's not bang on target. just make sure it's close, and that all your heddles are the same.

Cut each one carefully and try to place the overhand knots always in the same place on the heddle, so that the end results are all the same height when placed on the bar. I leave about 1/4 inch tails, and have become very accurate at placing the knots. You will find that it doesn't take much to create an uneven shed.Try your best. Make about 30. I don't know how much inkle these little cardboard bad boys can hack, but it won't be anything much wider than that.

TADA!! There you have your heddles!
Bear in mind these looms are temporary things. They probably won't stand up to the wear, tear and tension of long term weaving, so if you fall in love with the process you should definitely consider purchasing a loom.
Stay tuned for Part 3!
Thank you very much for checking out my blog! If there's anything you have seen in my previous posts that you'd like a tutorial on just leave me a comment!
♥ ♥ ♥ ♥ ♥ ♥ ♥
JQ
2 comments:
The method I use, the heddles go on after the warp. I always had trouble getting the skein or cone of yarn through. So my heddles are twice as long as they need to be. I fold each one in half over each warp thread. My heddles are nylon crochet yarn.
Super great explains on your videos
Post a Comment